HP LaserJet M1005 MFP - Clearing jams
HP LaserJet M1005 MFP - Clearing jams
This section contains instructions for clearing jams from the device.
Causes of jams
Occasionally, paper or other print media can become jammed during a print
job. Some causes include the following events:
-
The input trays are loaded improperly or overfilled, or the media guides are not set properly.
-
Media is added to or removed from an input tray during a print job or an input tray is removed from the device during a print job.
-
The cartridge door is opened during a print job.
-
Too many sheets have accumulated in the output area, or sheets are blocking the output area.
-
The print media that is being used does not meet HP specifications.
-
The media is damaged or has foreign objects attached to it, such as staples or paper clips.
-
The environment in which the print media was stored is too humid or too dry.
Tips to avoid jams
-
Verify that the input tray is not overfilled. The input tray capacity varies depending on the type of print media that you are using.
-
Verify that the media guides are properly adjusted.
-
Check that the input tray is securely in place.
-
Do not add print media into the input tray while the device is printing.
-
Use only HP-recommended media types and sizes.
-
Do not let print media stack up in the output bin. The print media type and the amount of toner used affect the output bin capacity.
-
Check the power connection. Make sure that the power cord is firmly connected to both the device and the power supply box. Plug the power cord into a grounded power outlet.
Where to look for jams
Jams can occur in these locations:
-
Input trays
-
Output area
-
Print-cartridge area
Find and remove the jam by using the instructions on the following pages.
If the location of the jam is not obvious, first look inside the device.
Loose toner might remain in the device after a jam. This problem typically
resolves itself after a few sheets have been printed.
Input trays
CAUTION:Do not use sharp objects, such as tweezers or needle-nose pliers, to remove jams. Damage caused by sharp objects will not be covered by the warranty.When removing jammed media, pull the jammed media straight away from the device. Pulling jammed media out of the device at an angle can damage the device.
-
Pull any visible jammed media out of the priority input tray.

-
Open tray 1 and pull any visible jammed media out of the device.

-
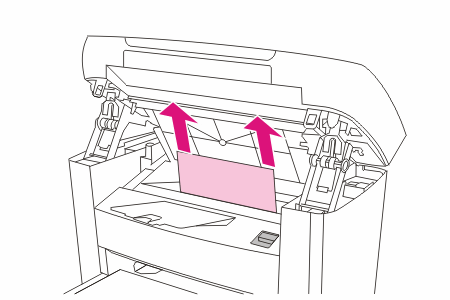
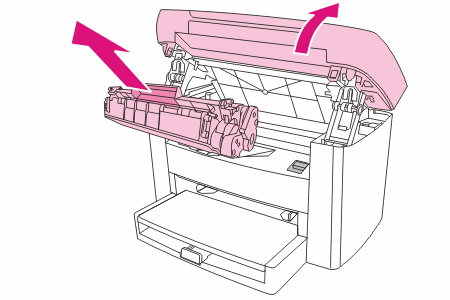
If no media is visible, open the print-cartridge door, remove the print cartridge, and then carefully pull the media up and out of the device.

-
Replace the print cartridge and close the print-cartridge door.

-
Close tray 1.
Output bin
CAUTION:Do not use sharp objects, such as tweezers or needle-nose pliers, to remove jams. Damage caused by sharp objects will not be covered by the warranty.
With both hands, grasp the side of the media that is most visible (this
includes the middle), and carefully pull it free from the device.

Print-cartridge area
CAUTION:Do not use sharp objects, such as tweezers or needle-nose pliers, to remove jams. Damage caused by sharp objects will not be covered by the warranty.When removing jammed media, pull the jammed media straight away from the device. Pulling jammed media out of the device at an angle can damage the device.
-
Open the print-cartridge door, and remove the print cartridge.

CAUTION:
To prevent damage to the print cartridge, minimize its exposure to direct light. -
With both hands, grasp the side of the media that is most visible (this includes the middle), and carefully pull it free from the device.

-
Replace the print cartridge and close the print-cartridge door.

https://support.hp.com/
Comments
Post a Comment